The Bedroom Makeover concludes with Part 3
After months of waiting since the stunning Part 2: DIY Wood Slat Wall, the last step in the mid-century modern bedroom makeover, including an amazing reveal, is here with Part 3: Do-it-Yourself LED Strip Light ceiling installation project to add a beautiful mid-mod ambiance without burning your wallet.
Here's the video overview of the project.
You can skip the following introduction section if you're familiar with the bedroom makeover project.
Before we dive in...
This third and last part of the bedroom makeover is the most fun of the 3 main parts. If you're here for the first time, the first part included an introduction that presents the genesis of the concept and how it took shape. All the major parts and sub-projects are self-explanatory so you won't need to refer elsewhere to accomplish any one of them but if you want to know more on the bedroom makeover as a whole, watch the intro in part 1 and keep reading below!
MULTIPLE SUB-PROJECTS
This is a big endeavor with multiple sub-projects. That's why I am posting them separately. An hour long article or video wouldn't make sense anyway. There are also other small projects that are related to the bedroom makeover but not exclusively, like how to fit a faux cactus in a mid-century modern planter, the IKEA Stockholm lamps hack or an upcoming wall art that's brewing and should be amazing. They will all be listed and tagged with "bedroom makeover" but they will not all be named as main parts of the bigger project, like this one.
FIND IT ALL: HUB OR TAG
To see all the main parts and smaller projects related to the bedroom makeover all in one place, you can visit the blog's Bedroom Makeover Summary Page. It acts as a hub for everything related to it with infos and all the links. You can bookmark that page and refer to it whenever you want to.
You can also open the Blog Tags drawer on top of every blog page and click the "bedroom makeover" tag to get a search results listing.
ADVICE
I came across some particular issues during this specific project. Instead of adding an update at the end to explain, like I did in the video of Part 1, my remarks, tips and advice are included along the way, in the video and in this post, so you don't miss any of them.
Now, let's light up the room and get to work…
QUICK START - A RECAP
This turned out to be trickier than I thought. Many people might benefit from my full research, tips and tricks. If this is you, keep reading the full blog post. If instead you just want the basics or a quick future reference, here's a recap:
- Make an extensive research to choose LED strip light wisely
- Make a cardboard mockup to test out your installation
- Mark the ceiling and mouldings
- Install anchors on the ceiling
- Prepare your mouldings with brackets
- Screw brackets on the ceiling, secure on the end wall too (helps for stability and shadow)
- TIP: Before painting, install the lights FIRST, just in case
- Secure the strip with clips, brackets, or similar. TRICK: Use tie wraps ends with a nail (see video). Peel & stick last, if you can.
- Test the strip
- Fill moulding angles and corners with paintable silicone. Smooth out with wet finger or special tool.
- Fill moulding joints with filler, let dry, sand, repeat if necessary
- Add silicone or filler from behind to avoid light through the crack
- Paint. For infinite effect, use same color as the ceiling.
DETAILED HOW-TO AND TIPS & TRICKS
First, some tidbits on why I decided to do this.
Why LED lights?
As you may know, the idea behind the bedroom makeover is to give that room a cozy and elegant feel inspired by the mid-century modern style, by creating vertical lines on 2 walls, then having led lights glowing down on them. We'll achieve those lines in 2 different ways, with curtains on the window side and wood slats on the bed side. Curtains are done and I removed them for this project but kept one panel up to test out how the lights would glow down on it. More on that in the mockup section. The wood slat wall is done too, it looks way better than I ever dreamed, but to be honest, I'm not sure how it will pick up the glow from the lights since wood and matte paint are not reflective at all, plus it's quite dark. I'm hoping for a nice surprise...
Of course, LED lights are not at all in line with the mid-century timeless style. This is where my “modern” interpretation part comes in. I wanted to give my room a different modern feel than the modernism of the era. Plus, I was hoping the glow from the ceiling would highlight these vertical lines and give the whole room a very elegant and relaxing feel. LED lights are ideal because they're easy to install, relatively cheap, and last for many years. Plus, with smart lights, you can change the mood, create scenes and program them.Why those 2 walls?
I chose those two walls because they are the main ones you see when entering the room. Also, curtains on the window wall would help with light, sound and heat. Wood on the bed wall contrasts with the light fabric headboard. For the wall facing the bed, in my original concept it was supposed to house a big IKEA PAX Wardrobe System with mirror doors. The idea was to make the room feel bigger and reflect the wood slats when getting in. After years of supply chain problems and never being able to get all the parts of my planned wardrobe kit, I might sadly lean towards another solution. This wall is on the back burner for now. I made a tiny project with a mirror just so it's not empty until I decide.
No now that you know a little more, here's the third and final instalment, not as simple and straightforward as I thought!
STEPS
Here are the steps we'll review in this blog post for this project:
PLAN
I made a ton of preparation for the whole bedroom makeover project and you've heard me before about the importance of making a detailed plan and prepare thoroughly for every project. I really did not think at first that the LED lights would require a separate project. I thought it’s such a simple thing, I’d just install them quickly and it would be 1-2 minutes of the wood slat wall video. So the plan seemed very simple at first:
- Install mouldings on the ceiling
- Install a LED strip light behind it
- Paint the mouldings
Here's the overall plan of the bedroom makeover that includes the LED light strip part:

Simple enough, right? WRONG! Every step of the way, I found myself with a gazillion questions. I was online searching for weeks before being able to decide on what lights to choose, how to do the mouldings, etc. I'm adding a separate section called LED STRIP LIGHT 101 about how to choose LED lights. You'll find it after the shopping list with hopefully enough information to help you decide for yourself.
MOCKUP
I bought the LED strip light first. Before shopping for other supplies or doing anything else, I decided to build a cardboard mockup of the moulding in an "L" shape, just to see in advance how it feels. I always keep some flat empty boxes for crafting purposes. The top part is a helper to check the distance from the wall and hold it into place, and serves as a background to tape and test the position of the strip. The front part is mimicking the moulding.
My room has shutters that were installed a few years ago, they are not original so they're over the wall. I calculated that the distance from the wall, including the curtains, would be 6 inches. So the first mockup I made was 6 inches deep by 4 inches high. I attached the LED strip temporarily inside the top part, about one inch from the side. I slided this over the curtain rail to hold in place, plugged the light, then went back down to see from the room how it turns out.
I quickly realized the depth was ok and the glow seemed fine but the height didn't work because I could see the pleats from a normal position in the room. I made a second one at 5 inches but still not quite enough. The last one at 6 inches was perfect. Although it seemed way too high to my taste, hiding the pleats was the better option.
One last thing though, I noticed that because the light was not against the moulding, there was an angled shadow and I didn't like it. Once I moved the strip right in the corner, the shadow from the moulding became almost vertical so my mockup was definitive.

For the wood slat wall, I calculated an approximate distance between the mockup and curtains, reported this on the surface of the slats, which gave me about 3 inches total from the back of the wall to get a similar effect.
Tip: If you try your hand at a project like this, don't skip making a mockup. Take into account all the particularities of your own room, test different options, adjust it until it's perfect. Cardboard is free and this will solve most problems in advance.
SUPPLIES
As I said, I already had the lights when I went shopping for supplies. I still wasn't sure yet how I would build this. I've never done anything like that before. Hardware stores like Home Depot and Lowe's have multiple options for mouldings. Here in Palm Springs, with the possible earthquakes, all I knew is that I wanted something light and solid that could stand a shake-up but would still be easy to work with. All the regular options I found were too heavy, too thick, too big or too fancy. I wanted something flat and simple, to fit in the mid-century modern feel. Walking around, that's when I found the baseboards instead and found the perfect candidate: a 5-1/2" thin MDF baseboard, pre-painted, and not too expensive. I bought 3x 8' boards for a total of 24' (there were longer 12' ones but I figured it would make a joint too close to a corner or the edges, plus my tiny Fiat wouldn't take it).
For the attachments, I went with very simple "L" shape brackets. I had planned on having one every 2 feet starting at one foot for additional hold in the corner, extras for holding the ends vertically on the wall, some longer ones for the corner where the walls meet, and flat plates to join boards together in the middle from behind.
Here's the shopping list for my own setup. Adjust according to your own walls and its specific features.

LIGHTS
Costco link: FEIT Electric Smart LED Strip Light
FEIT New model link: 16 ft. RGBW LED Smart Wi-Fi Strip Light
- Model TAPE16/RGBW, Article N° 1528979
- 16', connect 2 sets for 32' max. (connector included)
- RGB LED lights + separate white LED (RGBW)
- Includes controller, RF remote, mounting clips, power supply (for standard 120V outlet), connects to wifi (2.4GHz wifi only), works with smartphone
- About 3500K (unconfirmed)
- Density of about 300 lights for 32' (9.3 lights per foot, for each cluster of RGB+White).
- Costco $35/ea (2X)
- Note: Not sold anymore at Costco warehouse but was still available online at the time of filming. It seems FEIT now has a new model but I couldn't figure out if it's exactly identical. Please check before buying.
MOULDINGS - Craftsman Primed MDF Baseboard Moulding
- 8' long, 5-1/2" high, 1/2" thick, pre-painted
- Lowe's $20/ea (3X)
- Note: I bought 3-8' instead of 2-12' because of my tiny car and I didn't want the joint to be too close to the edge or the corner.
BRACKETS - Zinc-plated Steel Corner Brace
1-in x 0.5 in, pack of 20, Lowe's $8.78
PLATES - Zinc-plated Steel Mending Brace
3.5-in x .42-in, 4-pack, Lowe's $5.88
CORNER BRACES - Galvanized Steel Corner Brace
2-in, 4-holes, pack of 2, Lowe's $6.48
EXTRAS:
- HOMEMADE ANCHORS - Tie wraps, 1" finishing nails.
- Calculate 2 around each brace that are every 2 feet, plus one in between braces. This is to help secure the strip on the ceiling. See video.
- OTHERS - White paintable silicone, crack filler, sandpaper, paint, plastic protector, screws, drywall anchors.
- TOOLS - Saw, screwdriver, pliers, pencil, measuring tape, cardboard, painter's tape, hammer.
Total: $152 — Excluding extras but probably below $200.
Which lights to buy?
The lights were one of the first things I bought for the bedroom makeover. I had seen these LED strip light kits at Costco for a long time at $35 each—often on sale—but I didn't know anything about LED strip lights and I was not ready to buy yet. So I waited and waited... while in "Fear Of Missing Out". One day, I decided to go on a shopping spree and see what else is available elsewhere like Home Depot, Lowe's, Ace Hardware and Walmart. Oh boy... was I amazed!
As you may have noticed, Costco often offers only one product in a category. It was the case for those LED strip lights. But in every other store, there was a huge selection of sizes, colors, features, technologies, etc., enough to make your head spin. It shines, blinks, looks great... but no clue what to buy. They all seemed so different but the same? Prices were so varied, something was fishy. After spending way too much time reading every box, I finally picked up something from Home Depot, not even sure if it really was the right choice. Then I shopped around a bit more, and suddenly had the chills. What if I'm making a mistake? How am I sure this is what I need if I don't even understand the product? What if it's too bright or not enough?
I put it back on the shelf and went home. I was bummed. Time to search online and tame the beast. I had taken pics of the Costco product from FEIT Electric so I was able to compare. This learning curve took FOREVER!!! Hours of YouTube videos, reading blog posts, online shopping, Wikipedia articles... I'll spare you the details (I made a crazy chart and all...), but I was finally able to figure out that the Costco ones were the exact ones I needed. Back to square one, if you can believe it. I bought two boxes, sadly not on sale anymore, but I feared they'd be gone the next time around and I was right, a few weeks later, they were gone!
So here's my #1 advice for this project: make sure you know what you need and you find what you need. Don't just pick something up at the store because it looks good, like I almost did. Get to know how LED lights work, their features, pros/cons, and decide on what you really want.
To give you a head start, here's an extensive recap of my own research. If you already bought yours or know about LEDs, skip this box.
LED STRIP LIGHT 101
Here's a recap of all the info I found when studying which LED Strip Light to help buy the right one. If you want to get similar results as mine, I've added detailed info on my product from FEIT Electric in the shopping list.
Please note: I'm not an expert. I'm an ordinary person, just like you. I knew nothing about all this at the start of my project. If you find a mistake or have a more accurate information, let me know at shop@midcentury.style and I'll look it up, fix it, so we can all benefit from the best information.

WHITE
"COOL" means blue-ish like a neon or fluorescent bulbs. This is usually considered a "harsh" white but it might be better suited for work, especially in creative environments.
"WARM" means yellow-ish like an old-fashion bulb. This is usually considered a nicer and softer white but depending on where it glows, it might change how the room looks (blue wall + yellow light = green).
"KELVIN" is the unit that measures light temperature, like Fahrenheit for ambiant temperature. 3500 and below is warm like during sunrise/sunset, around 4500 is cool, and 5000 is sometimes called neutral and feels like natural daylight, 6000 is extremely bright. The term "Pure White" depends on who you talk to but is between 5000-6500. As a graphic designer, we often have 5000-5500K bulbs to be able to work with colors without the light source affecting its rendition on screens, prints or color chips. Overall: Low Kelvin=Warm, High Kelvin=Cool.
COLORS
"RGB" means Red, Green and Blue. Those 3 colors are all you need to recreate any color with light (different from ink or paint), including some tinted version of white. LEDs with only RGB are less expensive. If you aim for mostly color ambiances, that should be enough.
"RGBW" means RGB lights, as above, but with a separate "bulb" for White. That extra white led will allow you to create more subtle variations on lighter shades or dimmed tints, including all shades of white. It's a bit more expensive but if you want more range, especially for whites, look for that. That's what I have and I'm so happy I didn't buy the cheap stuff.
POWER
Most strip lights come as "plug-in", like a standard lamp. Some need a separate power brick sold separately, others are hardwired meaning directly connected to the electrical source and switch of the room (like some under cabinets pro systems). Most are 120V but some use different voltages and need a converter. Make sure you know what you're buying. This might influence some features, like if you can dim them or not.
LENGTH
Some strips can be cut or connected in series but others are self-contained.
I was able to connect two 16' strips together, the maximum length allowed, for a total of 32', neatly linked with the provided connector. I cut off about 8' at the end to get a perfect fit.
CONNECTING: If you plan on connecting multiple strips, watch for the maximum length possible. If a model you like is too short but can't be connected to a second one, look for a longer model from another company. For very long installations, you may need 2 separately powered kits. Whatever you pick, check if you can cut them or not because if the total length is too long and you can't cut it to length, you might be better off with a longer model that can be cut, even if it's more expensive.
CUT: Read instruction to learn where to cut, this is very important. If you buy a model that can't be cut, think of where the surplus will go and how it'll light up differently in that section, if it matters.
CORNER: If turning a corner, some strips are hard to bend and require a connector. I got lucky.
DENSITY
Check different models for the density of LEDs per foot. Most don't even mention it but you might be able to figure it out from the pics or online. Cheaper strips may have fewer lights and result in a very basic glow, which may not be even because there isn't enough bulbs. This means you may get the infamous "dot" lights glowing down. Some high-end ones for specific usage have a ton of lights, which makes them more expensive. It may sound great but if you never use more than half the intensity, it's overkill. So think carefully of where it goes, the intensity of the light you need, and if the light has to travel a long way or not to get the desired effect.
By the way, the notion of density with LED lights is a bit fuzzy to understand and I had a hard time figuring it out. But once I learned about it enough, I could tell in-store that some cheap products might do the trick just to light up under a table or around a TV, but would never be enough to glow down a wall.
For reference, mine have 9-10 lights per foot (1 light = a cluster of RGBW) which equals to about 300 lights for 32'. This provides enough range to get a nice bright glow or a soft dimmed fading effect.
FEATURES
Here's a list of features and options I came across during my shopping. This forced me to search online and then pick what would be a dealbreaker for me. Also, some features may not work with others, which made it even more difficult to figure out what to buy.
CONTROL: Smartphone, remote, wall switch, hardwired, plugged in.
AUTOMATION: If it can work on a schedule, it's usually done through a phone app.
PROGRAM: Scenes, sequences, music-aware.
EFFECTS: Single-color, fade, flash, strobe, slow, fast, etc.
DIM: Both color and white or just one or not at all. Depending on type, power and control, they might not be dimmable through a light switch or an external dimmer. If it can be dimmed, they'll specify it. Don't try your luck if it says otherwise or doesn't mention it.
MOUNTING: Self-adhesive, clips, rings or a combination.
WIRELESS: Connect to wifi (sometimes only on older 2.4 networks), home automation, etc.
VOICE ACTIVATION: Alexa, Google, Siri... or not
PREPARATION
The idea is to install mouldings on the ceiling that will hide the light strip and the top of the curtain pleats. The preparation consists of:
- Planning measurements, anchor types
- Marking the ceiling and boards (either separately or all at once)
- Plucking holes for anchors in the ceiling
- Inserting anchors
- Prepare the boards
You want it to be extremely sturdy, so it'll hold up no matter what happens. Make sure you choose the right type of anchor for your ceiling/wall material. I opted for ordinary drywall anchors and was lucky that in many places it fell on the wood framing inside the ceiling. It turned out to be very solid.
To help positioning anchors, you'll want to mark a guiding line with a pencil. A little trick was to cut a cardboard piece the right depth and use it as a guide to draw a line.
My preferred measure on the curtain wall was 6 inches, and 3 inches on the wood slat wall.

For the latter, as the slats made things difficult and were not level from the front (surprisingly), I cut a cardboard template that could be inserted through the slats. This guide sat on the back wall rather than on the slats and helped me draw a straighter line.

I chose to put an anchor every 2 feet, starting with an extra one at one foot. Plus additional ones on the side of the moulding to level and secure it vertically on the adjacent wall. At first, I thought I'd simply mark the ceiling, make holes and insert the anchors, then pull up my boards to mark those positions on them, and finish the prep by screwing the "L" shape brackets. After the very first board, I realized it was a bit awkward and difficult to hold the moulding up in place to report the ceiling positions on the board with a pencil. It's just too long and you have nothing to hold on to. So for the second wall with the wood slats, I did it the other way around. I marked the positions on the board first, held the board flat against the slats and transfer those marks on the ceiling. Holding the board on the wall instead of the ceiling was much easier. Then, I adjusted the ceiling markings to the desired depth (6" and 3").
MOULDINGS

Installing up the mouldings was a bit of a challenge. The curtain wall side was easy because I had enough clearance to screw together the two pieces once they were up there. I installed a flat plate at the end of the first board and after screwing the second part on the ceiling, I joint them together from behind. To make it easier, think of drilling holes in advance.
But that didn't work on the wood slat wall because there was not enough clearance to screw from under and join the boards. After trying all kinds of dangerous stunts, like joining them in advance—resulting in a huge 12' board— and holding one side with a rope and almost tripping down with it, I had to pause and I finally ended up with an original solution. I took a screwdriver head from a multi-use tool, gripped it in locking pliers, and that proved to be short enough. I drilled the holes in advance and it worked! I was able to screw my boards on the ceiling and then join them from behind with the metal plate thanks to my new homemade tool.

For the corner, I used longer "L" shaped braces. It's not perfect but it works.

I know I've mentioned it before, but adding an extra bracket on the side where the molding rests on the end wall turned out to be the best way to level it vertically, especially to make its shadow straight, and secure it so it doesn't just dangle from the ceiling.

LIGHTS
Installing led lights is pretty stupid, right? On the ceiling, not so much...
My LED Strip Light box says that for a permanent installation, you should use the included mounting clips and not rely only on the 3M peel-and-stick adhesive, even thought they do mention that this adhesive is permanent and can damage any surface. Hum... That's kind of strange but it makes even more sense on a ceiling installation since gravity will be pulling it down over the years.
In my case, the problem is that to make a perfect straight shadow from the moulding, the light strip has to be tuck in the corner. That means that those clips won't work because they have a lip on both sides for screws. Plus, they're in a rubber material. If I cut one side, the center part is too flimsy to hold the strip. So I came up with an innovative solution based on the same idea.
I have a ton of tie wraps from a costume concept that has not materialized yet. I realized that there is a recess at the end. So I cut it to the length of my strip light, inserted a nail in the square opening usually used to "zip" the tie, and voilà! I had created a kind of clip, secured on one side, strong enough to hold the strip, plus you can twist them open for adjustments.

Once I created this original solution, it was kind of straightforward... but it takes a loooooong time. Just nailing in the zip ties around the brackets takes forever. I'm a bit of a perfectionist so before removing the adhesive backing, I slipped on the strip, tested it out first, tried all the bells and whistles both on the app and phone, and once I was absolutely sure everything was good, I removed the sticker backing and made it permanent.

The corner was easy to do and I didn't need a connector. I got lucky again.

I cut a little more than 8' at the end and the fit was perfect.

FINAL STEP
Now is the time to finish it up. I used paintable white silicone on the angle and corners. To smooth it out, I found a cheap and nifty tool at Home Depot specially made for that, like a rounded corner big pen (and yellow), but a wet finger will do the trick, just keep a very damp cloth at hand to wet your finger along the way. I did both: tool for first smoothing, finger for finishing touch.

One trick off the bat, add some silicone "behind" the crack where two mouldings meet. This sounds weird but light WILL glow out from it. The lights are too close and that extra shine will let any tiny crack glow through.
On the front, add some filler, let dry, sand very smooth, and repeat if necessary. Just make sure it looks even so spread it wider to avoid the look of a bump. This is what I mean by repeat is necessary. I'll be honest here and say that after a few months, here in the extra dry desert, the crack has started to open up again. It doesn't show unless you're very close but now that I know it, I'll be fixing it. From the doors or the middle of the room, you can't tell. But this can happen, even with famously stable MDF.
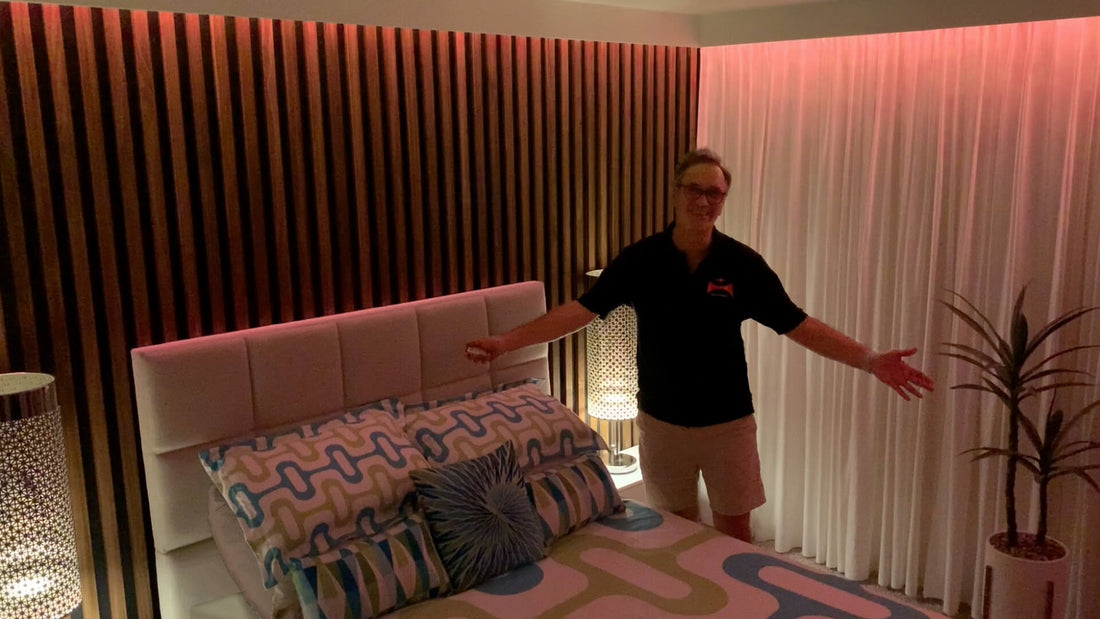
And we’re done!
To be honest, it was a much bigger undertaking than I thought. But the result is absolutely stunning. The grace of the curtains, the warmth of the wood, the gorgeous glow of the LED lights slowly fading from one hue to another, everything feels incredibly cozy and elegant. There are no words to describe it, probably because I've done it myself, and every night when I crawl into bed and admire the decor, revelling in this lovely view, I'm reminded that if you put your heart into something, absolutely anything is possible. I hope this inspires you to try it out yourself. And if you do or have questions, please leave a comment!
It's hard to believe that the bedroom makeover is "over" but here we are. See you soon for something new. I have so many ideas on the back burner like a gold wall art over the bed, the bedroom floor lamp, the bathroom makeover, a mid-mod wine rack, and so much more.
To finish up with a fun tidbit, here's the before and after of the bedroom compared to 2013 when I bought the condo.
BEFORE...

AFTER...

Until next time, ciao!
PRODUCTS
Products mentioned or seen in this project and video. Click each to learn more:


![]()
Or shop by category:
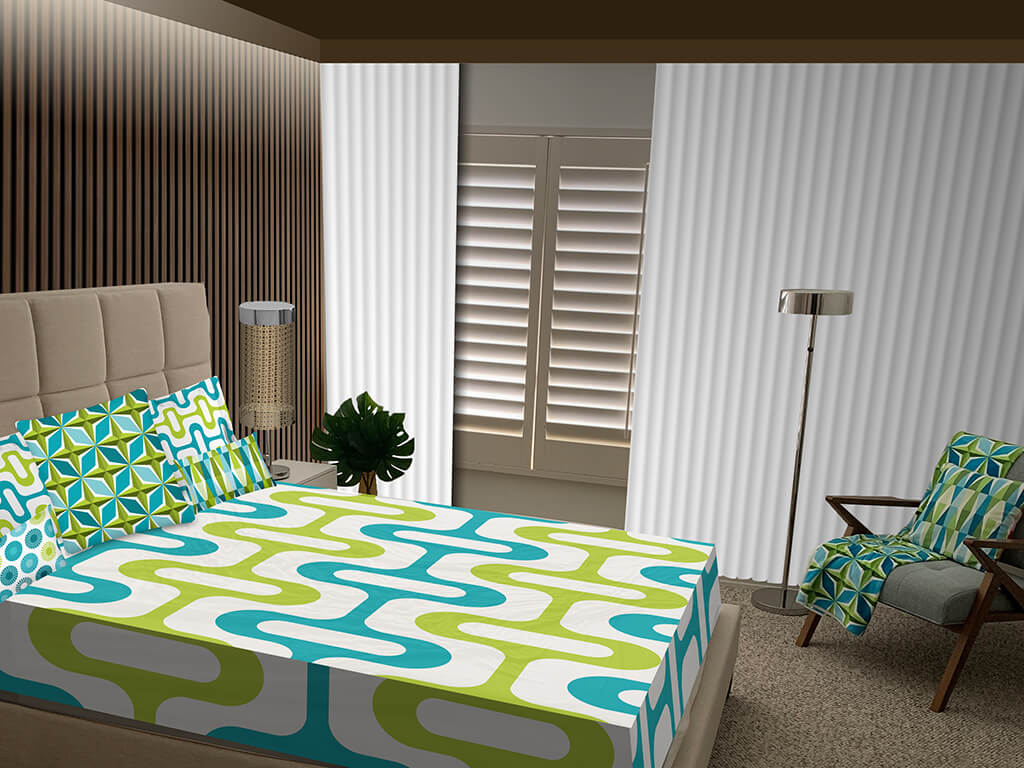
BEDDING THROW PILLOWS THROW BLANKETS
One last thing...
Some of you may have noticed that the moulding and ceiling were left white. In the original concept revealed during the intro of Part 1, I was planning to paint the ceiling dark brown. But as I mentioned in the video, I changed my mind about this. I'm afraid it would make the room too dark.