IKEA hack: Stockholm Table Lamp DIY Mid-Century Modern Makeover
The most fabulous IKEA Hack Table Lamp Mid-Mod makeover!
This is a fun do-it-yourself project that is part of a bigger one about remodeling a bedroom in a mid-century modern style. I thought it would be better to make this a separate one. It may seem very simple and in many ways it is, but it requires time, patience and precise execution. The devil is often in the details... But the result is absolutely amazing!!!

This all started a few years ago when I bought a trio of IKEA Stockholm lamps: 2 side table lamps and a matching floor lamp. The 2 table lamps were too bright to my taste so I created a blog article project on how to soften it up a bit. But then, when I started considering to completely remodel my bedroom, I loved those lamps so much that I soon started to think on how I could salvage them by giving it a much more serious mid-mod makeover.
The IKEA Stockholm lamps seem to be on their way out from their catalog. The floor lamp is nowhere to be found and the table versions are almost always out of stock. But tons of people have bought those, including me, and we really love them. They are very well made and feature an amazing chrome finish, a super sleek design, and a nice dimmer scroll-button.

Back to my bedroom project, once I was able to take it apart to understand how it's made, the idea of reshaping them came to life. All I needed was the right material. And that's how a regular visit at my local Home Depot became the center of this project.
I had seen many DIY projects online about lamp shades made of perforated sheet metal but none gave me goosebumps. They were either flimsy, too small, or lacked personality. My main concept was to create a very high lamp shade, like in the old days with vintage lamps, hoping that this idea would take those IKEA lamps to a completely new level.
I started going around all my local hardware stores regularly to get a feel of what to expect on the availability of sheet metal panels and their designs. Unfortunately, very few models were offered in a large enough size to fulfill my plan. The one that kept being available non-stop was the Union Jack pattern at 24" x 36", which is one of the biggest size you can get. So I looked up various manufacturers' websites to see if I could find any mid-mod designs in a large size that I might be able to order online. But then, I was afraid it would arrive beaten and scratched. Shipping companies are so busy these days, you never know how your packages will arrive at your door.
So after a couple of months, I settled on the 24" x 36" union jack silver sheet metal panels. These had been the only 2 available in that size for a while at Home Depot and only one of the same at Lowe's, so I really got scared someone else would run away with them. But I was still hesitant on the overall concept so when I got home, I put them aside for a while.
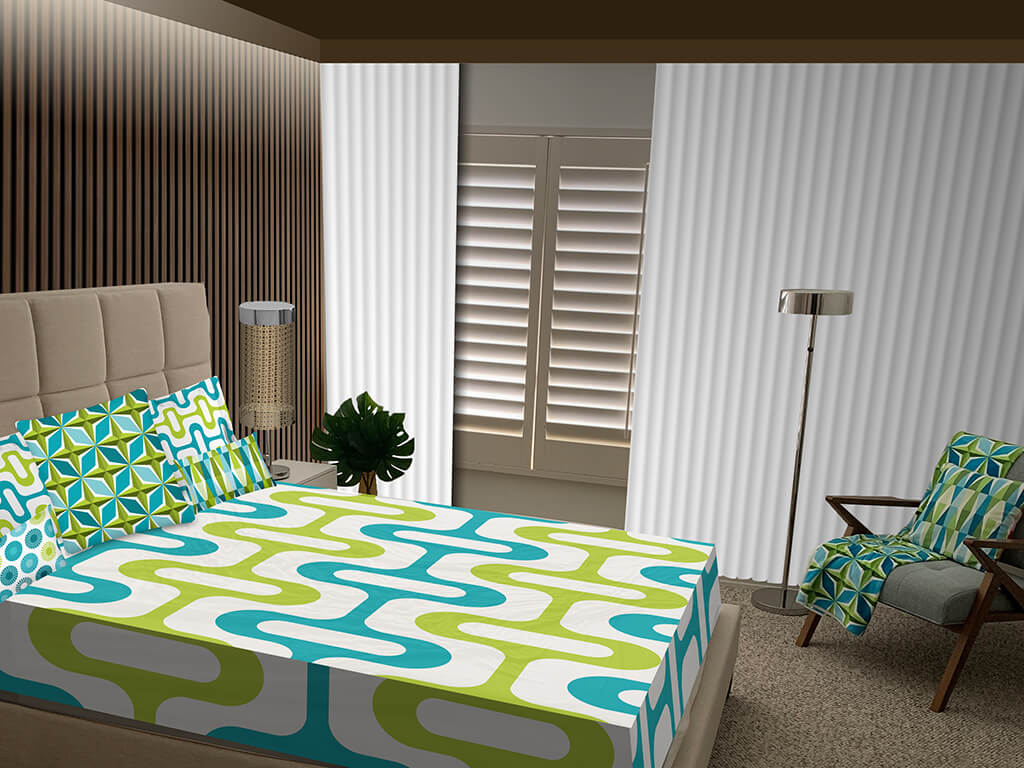
I was already thinking of painting them another color because the mid-century modern style often mixes colors and textures and that's what I had in mind for my bedroom makeover. My current plan calls for a wood slats wall, white curtains from top to bottom on the window wall, a dark brown ceiling with recessed light strips all around the room hidden under moldings, and a mix of aqua, lime, gold and silver for everything else. I wanted to do the lamps first and I was looking at the sheet metal I bought every day for a couple of weeks asking myself: Gold or not gold?
Then one weekend, the wait was over and I decided they'd finally get a color treatment. That decision was an instant winner and I never regretted it!
And this is where this project starts...
Steps
This is a project with many steps and details. Since the video gives away a lot of the tips and tricks, I'll take the bullet point approach on this blog to try to make it shorter. If you ever have questions, feel free to leave a comment and I'll be happy to help you out!

Supplies
- White Mactac
- Rust-oleum metallic spray paint in Champagne Bronze
- Sheet metal 24" x 36" in Union Jack pattern
- Galvanized metal wire, 20 lb, Gauche 19
- Huge Duct Tape roll or something similar
Tools
- Metal cutters
- Pliers
- Protective goggles
- Scissors
- X-Acto
- Marker
Paint the sheet metal

- Spray paint with Rustoleum Champagne Bronze (looks like old gold)
- At least 2-3 light coats
- Let dry thoroughly because you'll have to handle them in many different ways. Plus, it smells like crazy, I had to let it sit overnight on the balcony before transferring those to the bedroom.
Take the lamp appart

- Unscrew the lamp shade from its base
- Slide out the outer chrome ring of the shade
- It will be used on top instead at the very end
Warmer light (optional step)
- Now that the chrome ring is off, the resulting shade is made of translucent plastic and that might be too bright for a bedroom
- If that's your case or preference, just like me, take the whole thing apart

- The shade is made of 5 parts: #1-An outer chrome ring (that you normally have already slided out); #2 & #3—2 translucent plastic half circles that connect together with pins and holes which are easy to take apart; #4 & #5—2 frosted glass circles, held in place by grooves on the plastic half circles, where one has a hole in the middle for the mechanism that screws itself to the lamp base.

- Add Mactac to the inside of the 2 plastic half-circles and cover the full glass circle with another piece (use the non-painted side—look at the video to see how to take it apart). Make sure to cut that mactac circle slightly shorter otherwise when you put the whole thing back, it might twist and become messy. Remove bubbles from the mactac by scraping your nails on it or use a credit card.
- Mactac will add a soft warm tone to the light. You can even add 2 layers if it's not soft enough for you.
- Once you're done, put the shade back together
Roll

- You need to make the sheet metal curved to help for measuring and fit
- Start slowly by slightly bending with your hands
- Switch sides halfway through
- Once the sheet starts to have a curved feel, use a big rounded object, like an oversize duct tape roll, to put in the middle and roll the sheet metal on itself. This should allow you to force the panel to bend a little bit more but making sure you don't dent it in a bad way.
Measure

- Place the curved sheet metal around the lamp's shade
- Measure slightly under to have a small extra, you only need an extra line of pattern
- The thing to remember for this specific project, if you're using the same IKEA lamp model, is that the final result will not be a perfect tube but a slight cone because of the way the sheet metal will be placed (over the shade on the bottom but under the ring on the top) so you only need to measure from the bottom and in the end, the top will have a slight overlap
Cut

- Use a good metal cutter
- Go slowly, one metal stripe at a time
- Try to keep cutting on the middle of the blade, using the top might make unwanted dents in the metal
Secure it

- Roll the sheet metal around the lamp's shade, make it really tight
- Using a small metal wire, secure the panel on the shade as tight as you can without damaging the metal lace
- Then go on the other end, temporarily slide in the chrome ring as a guide, and make a 2nd knot
Stitch

- Put on safety glasses, the free wire will spin around a lot
- Using a long metal wire (at least 1.5 times the length of your tube), start stitching from the base to the top
- Take your time. Flatten out stitches, inside and outside.
- Metal wire is harder to manipulate so use your fingers to keep it rounded at all times and check non-stop to make sure it's not twisted in an undesirable way. If you make an unrecoverable twist, knot or mistake, cut it, secure it, and start where you left off with a fresh wire from the inside, it won't show.
- Remove the 2 temporary wire attachments
Put it back together

- Once all this is done, the rest is easy
- Slide the metal tube on the original shade from the top
- Use the larger opening at first—The 2 openings of your tube should not be equal if you are using the same lamp as a starting point and that's because the sheet metal tube is sitting on the OUTER shade on the bottom but on the INNER chrome ring on the top. That very slight difference is how the new metal lace shade will just "sit" on the original shade without the need of any anchors.
- Slide the chrome ring on the top
- Screw back the whole thing on the lamp's base
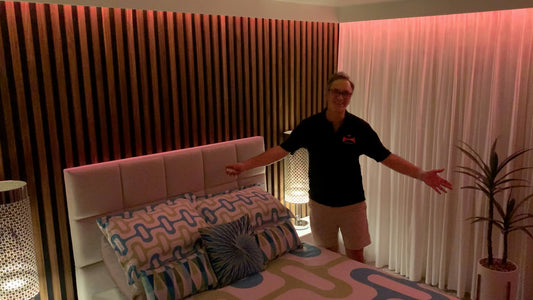
- Put in your bedroom!

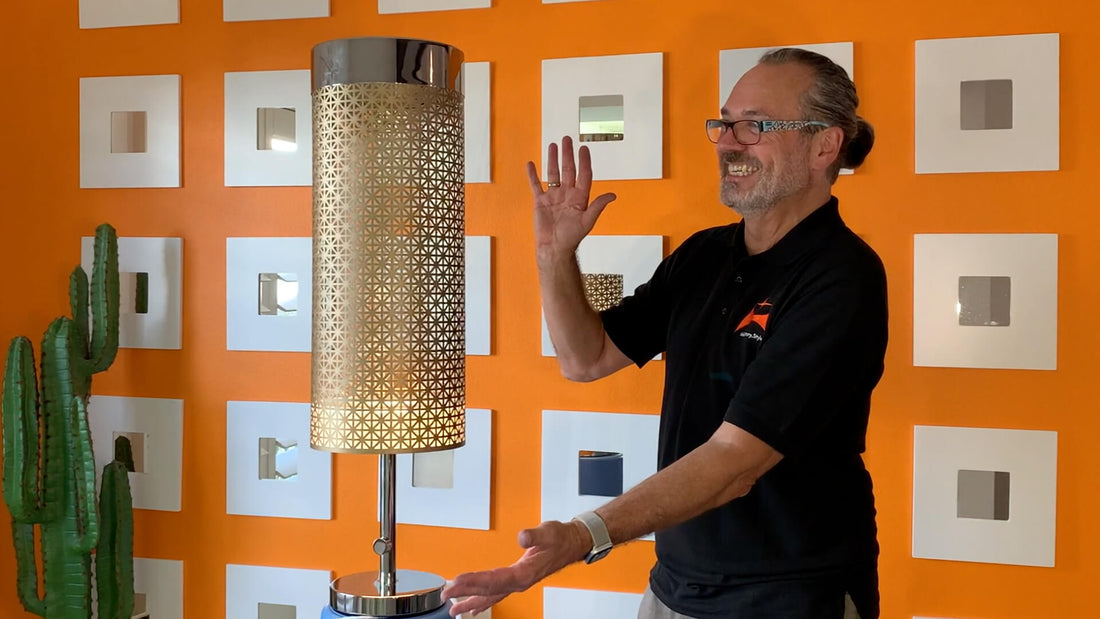
Conclusion
I have to say that this project was one of the most incredibly satisfying. It looks so unique and gorgeous, I still can't believe I did that myself! The mid-century modern room divider project has been the most popular project for a long time and by far, but I have a feeling this will drive a ton of interest. I hope you try it out yourself and adapt it to your own lamps in some new creative ways! If you do, write a comment, it's always fun to share and discover.

PRODUCTS
Products mentioned or seen in this project and video. Click each to learn more: