DIY mid-century modern Hollywood Memory Wall of Sinatra, Marilyn and friends, with IKEA frames and online images
Frame, frame on the wall...
Don’t know what to do with a big empty wall in your living room? Still waiting for THE ultimate item that will set the tone? Wait no more and do it yourself!
This how-to will inspire you to create an astonishing Hollywood Memory Wall. It’s a very simple do-it-yourself project, perfect for a weekend rainy afternoon, and it will enhance your decor in a snap. Not to mention the creative joy of doing it yourself.
Sunnylands: the inspiration
The idea for this memory wall, sort of homemade Hollywood gallery or “Wall of Fame”, came to me after visiting Sunnylands, the famous 200-acre winter desert escape of the Annenbergs in Rancho Mirage. Only a few minutes from Palm Springs, it’s one of my favorite historical landmarks ever! I’ll write an article about it one day, there’s too much to say. Still, here’s a little background...
I visited the historic house twice (and I plan to go again). My favorite thing is the “Room of Memories”. It’s filled with a gazillion artifacts about visitors of the estate. Walter and Leonore Annenberg were accomplished diplomats and philanthropists. Walter made a fortune founding TV Guide, and was later appointed UK ambassador, among many other things. For years they were both connected to everyone who was anyone in the world between the 1960’s and 80s. Celebrities, heads of state, royalty, journalists, you name it. Not to mention 6 presidents including the Reagans who spent new year’s eve there 18 years in a row, Queen Elizabeth II had lunch, it was Nixon’s retreat after his departure, or the venue for Sinatra’s wedding with Barbara!
Here’s a link to a virtual tour of the Room of Memories on Sunnylands website.
So I thought…
Why not create my own Celebrities Memory Wall!
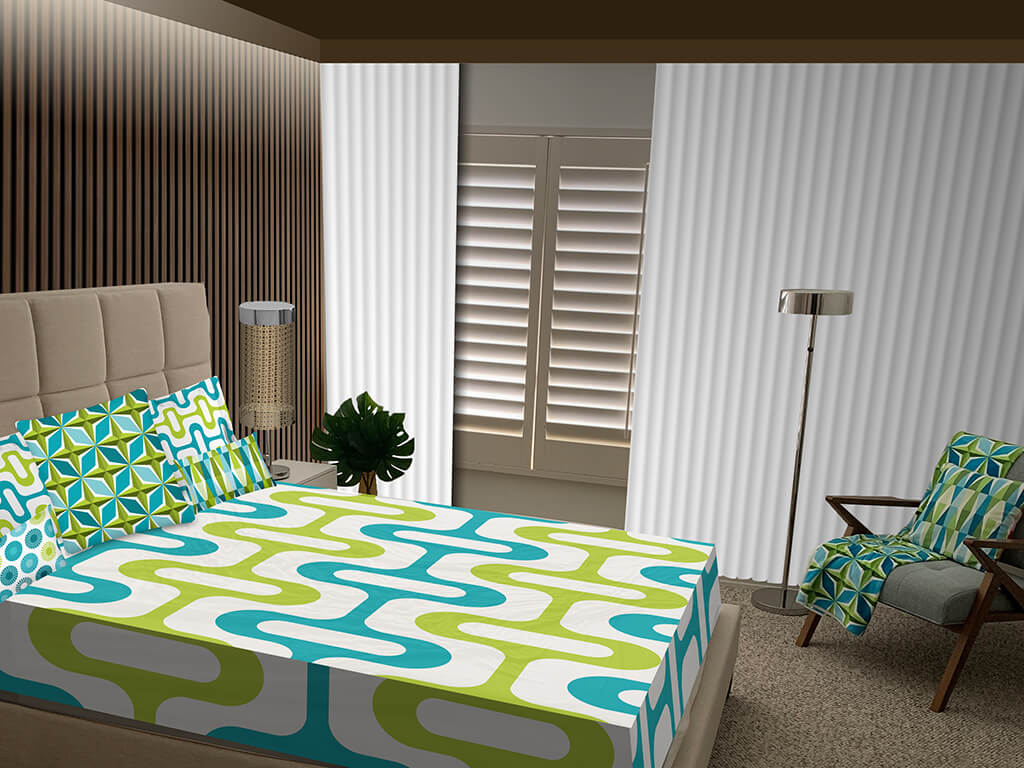
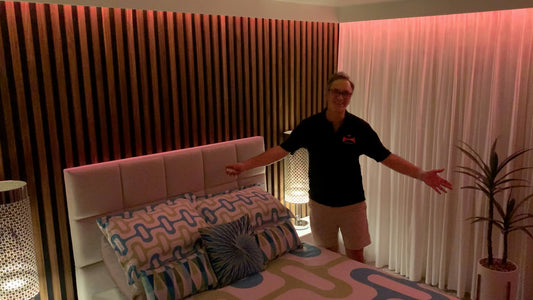
Let's go back to our project. As you can see in the video, my living room has a high ceiling. This big white empty wall needed some love. But I didn’t want to take the visual focus away from my gorgeous mid-mod orange chair. Home decor style of the middle of last century is often a mix of shapes, hues and even funkyness. But the mid-century modern style is about clean and simple lines. So I went with something neutral, all black and white, with IKEA Ribba 12" x 16" black frames, which was a constant color of choice for mid-century framing. Now that I’ve pointed it out, I’m pretty sure you’ll notice it from now on.
Plus, going neutral for such a large installation has the advantage of fitting well with any color, decor or style. It makes a chic statement and captures light in an beautiful way, adding its own character to the feel of the room. Take my advice, don’t go for color images, you’ll lose the effect, unless your goal is different than mine, of course.
Who to choose?
The first step is to decide on a theme. Here’s a little story about my own selection and why. You can skip it but showbiz gossip is always kinda fun…
So that was my line-up. Of course, yours will be just as good. My advice would be to carefully select your celebrities or subjects. Don't forget the male/female ratio and how you'll mix them. If you choose wisely, this can become a fabulous icebreaker with your guests and you'll have an instant winner when people ask about your "collection"...
Find images


Next you need images. This is easy, just Google them. You’ll find it easier on a desktop computer. Go to Google.com, enter something like “Marilyn Monroe caricature” and press enter. You’ll see results immediately with a few images and links. Now click on the second choice on top called “Images” to restrict results to images. This is where I have a trick for you: If you want to save time and get high-resolution images right away, look on the right for a button called “Tools” and click on it. You’ll see a submenu opening up under the main menu. The first item on the left of this new submenu is “Size” with a little arrow. Click that. This allows you to filter the images to only the large ones if you want. Try that first. If you don’t find what you need, then go back to “Any size”. I recorded my screen while doing this and included a camro of it in the video, if you haven't seen it yet.
Now that you have this submenu available, you can also try the other options at any time you search for something. For example, when searching for an event that just happened recently and you end up with a ton of unrelated results, you can omit all this old stuff by clicking the “Time” button and select “Past 24 hours”. Let's say you heard of a brush fire nearby and want to know more. You don't want to read about all the fires in the recent years, just the one that happened today. By restricting the time, you'll get the right link much faster, probably in the top 10. It’s a real time saver.
As for the images that you want to use, just be responsible with copyrighted content. If it's a starting point for a homemade crafty project and it's for your own enjoyment only, it’s probably fine. Of course, the ideal scenario would be to find perfect images and buy prints directly from the artist or ask them to modify it themselves. But that's not the point of this diy project. I couldn't even retrace where I found most of mine by now. I did find Marilyn back while researching for this video and blog post, and I'm happy to give credit to a cartoonist named Fyra, beautiful work, but the rest of the info and links was unclear. Just remember to be respectful and that you should never sell or distribute what you do with these. In any other case and if you know the source or you're in doubt, try contacting the artist, you’d be surprised how they might be understanding or offer a great deal for multiple prints. You can also buy online nice drawings or images if you're not computer-savvy, which is the next step.
Get to work...
Once you have all the images you need, you’ll want to modify or retouch them to make them similar. This is where the fun begins but also where you'll be a bit on your own. Hopefully, you have access to an image editing software like Photoshop and are confortable using it. For a free alternative, try out GIMP (here's the download page), it’s an open source software and it works well. The goal is black & white images (either searching for it or modifying whatever you find). Use the software to simplify the drawing, remove or erase extra/useless stuff, keep only the lines that are necessary, brighten if required, add contrast, aim for the style of a quick pencil drawing.

You should also try generic filters. In Photoshop, the Black & White filter is quite good. Don't be afraid to try any adjustment filter available, they might provide a good start. Just play a little bit. Remember to take notes along the way to be able to reproduce any final effect on all your images. I often use the Curves adjustment in which you can click the white or black point sampler, click the image to determine what should be dark or light and I go from there with the eraser and I redraw whatever needs to be cleaner. A good strategy is to start with your favorite image of the batch, modify it the way you like it, and then match the others to that one, using it as a reference. This way, even if you don't make each one identical, referencing the same one every time will help achieving a good overall similarity. This step is the bulk of the work but it’s the fun part also. Don't hesitate to pause and put it aside for a while and give it another look later.


If you’d like to add signatures, just like I did, repeat the process and mix them up in the app. You don't have to put them all in the same position. In fact, it will look more natural and more like a collection of signed portraits if they're not autographed identically.
Also, always work on the same canvas size (or frame size) and provide for a little extra space around to be hidden under the mat of the frame, using at least a medium resolution of about 150dpi. That should be enough for a nice home print.
Test it out
Once everything is done, do a test with only one image and print in black ink only to see how it comes out. If it comes out somewhat colored, see if your image is really in Grayscale or instead RGB (screen color). Although both can be nice and RGB might even come out with a richer black, it's harder to match them all together visually if you work in RGB (look for the "image mode" or "color space"). If your test print needs adjustments, make those corrections right away and try again. Don’t worry if it takes a few prints to get it right. It's much better to test one print a few times than have 9 bad prints every time. When you’re happy, apply those changes to all the images, if required, and print them all. It took me a while and multiple test-prints to find the perfect balance from screen to paper.

The secret sauce: Try printing on cream paper, it brings a nice vintage feel to the whole project and makes a subtle contrast with the white mat of the black IKEA frames.
Hang in there
Time to hang and you’re done! Last advice: PLAN AHEAD!!! Don’t even think you have a good enough eye to align 9 frames on first try. Measure everything, twice, even 3 times: distance from the floor, ceiling, adjacent walls or decor items, tv, window, etc. then add all your frames widths and lengths. Don’t forget to include the distance between frames (I used 2 inches) and take into account the way it’s anchored in the back. The best option is if all frames have fixed and uniform anchors, wires aren’t reliable enough.

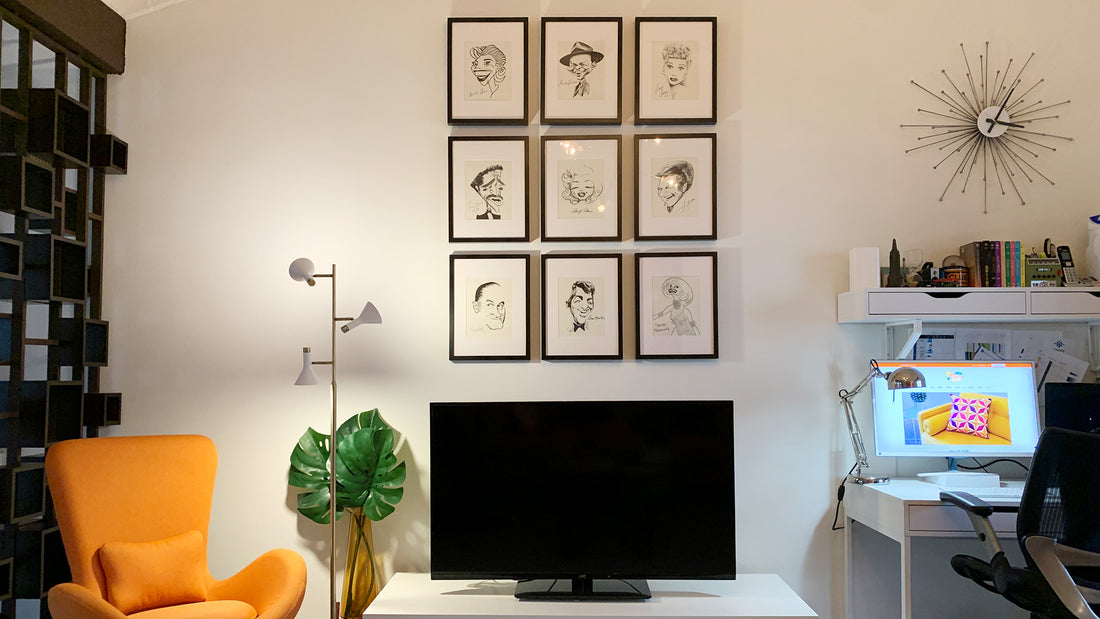
For myself, I made a detailed plan in a drawing software to know where I’m going and try a few layouts. I even took a picture of the wall, carried on precise measurements (referencing my TV), and adjusted the whole thing to maximize the layout. I actually discovered that I was aiming too high in my head. Of course, being a graphic designer makes it easier for me. (Note: I made this project a while ago when the living room wasn't finished yet, hence the difference of this picture from the video).
A few considerations for the layout: male/female ratio, angle of their profiles, looking outward or inward, drawing intensity, etc. Shuffle them up a few times to see how it fits. Aim for a good balance. Planning will also help when hanging on such a high wall, you don't want to have to reach up there multiple times.
You don’t have to go that far with precision of course but take you time. If you do it right, you’ll have to nail it and install it only once!
Light it up
And then, think of how you’ll light it up at night. It sure deserves the right lighting. I have a 3-spots mid-century modern floor lamp, each with a separate dimmer on top. It’s the perfect adjustable light source, it looks amazing, and it complements so well my Hollywood Memory Wall.
ENJOY!
I hope you try it out and have fun. If you do, leave a comment and share your thoughts!
VIDEO NOTE - Bloopers!
Although I practice a few times in advance with cue cards for my videos, I usually do them in one or two takes. I feel it's more natural and people will notice and appreciate it, even if I might forget something. But not this time!!! I had to do almost 20 takes on 3 days. I don't know what happened, something wasn't giving it's blessing. Bad hair, voice or sound problems, forgetting stuff, laughing, phone rings, bathroom fan sound, etc. Since it was such a fun source of bloopers, and it rarely happens, I decided to add them at the end. So stick around and have fun!