DIY mid century wall decor for less than $125 with IKEA mirrors
Mirror, mirror on the wall...
Here's a clever mid-century modern decor trick for a dinning room divider wall, easy to do with only paint and IKEA mirrors for less than $125! All you need is a bit of time, precision and planning.
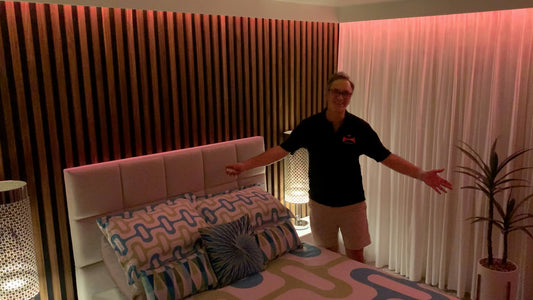
Here's the video I did a few years after the project to show you in real life how it looks, plus a look at my dinette set:
Start with a boring dining room

After painting the whole Palm Springs condo white (Benjamin Moore Simply White OC117, color of the year in 2016), there was this useless wall that stood between the entrance and the dinning room. The perfect candidate for a decor statement.
I searched everywhere for ideas to give it a mid century modern look without spending a fortune but everything I fell in love with was either expensive like huge mirrors, consoles, colourful artwork (I think I love nice things too much...) or a bit complicated to install like wood panelling, 3D wall panels that you can paint, faux stone, embossed 3D wallpaper.

Think outside the box

I decided to try to do something myself. I made some mockups on the computer. I'm a graphic designer so that's the easy part for me. Some ideas turned out really cool like the mockup I posted here but it meant a lot of work and buying special tools (precision cutting, patching, installing, painting, ...). I could always surf the web to find the right pattern. Found some in plexiglass and acrylic but it's expensive.
So one day, I'm at the IKEA store and while looking for inspiration in the mirrors department, I see a box of super cheap little square mirrors. $1.99 each. I pick one in my hand. Two. Put them side-by-side. And EUREKA!!! I could see the wall in my head...
Since I had already made the plans on my Mac, I knew the measurements of the wall by heart. A little quick on-the-spot calculation and I bought a whole box (36 + one for extra, just in case)!
Just do it!
The rest is easy. Paint the wall. Make measurements (that should be the most time consuming part... take your time!!!). Mark the nails positions precisely. Unpack mirrors. Hang. Voilà!

Some advice if you want to try it out...
Orange paint


Take your time to choose the color, especially if it's a bright color. Hang swatches for a few days, move them around each day, and see them in daylight and evening and even with lighting on and off or curtains closed and open. You'll be amazed how a flashy color can change with different lighting and light bulbs color. Standard bulbs are yellowish and some eco-friendly bulbs have an ugly blue tint. You can love it in the Saturday morning sunlight but hate it in the evening or vice versa. Don't be afraid to do 3 coats if the color is not really smooth. Choose an eggshell finish to be able to spot clean and to avoid reflection since you'll already have a lot from the mirrors. Protect everything like ceiling lamp and cord. Let dry between coats and at least overnight before marking the nail holes. You'll live with it for a while, better do it right.
Measurements
Be patient! Measure everything and make a precise plan of the whole wall. Take into account the position of the hanging hole on the back of the mirrors (see plan). You want those mirrors to be perfectly aligned. Don't forget outlets, light switches, door bumpers, etc. If something is in the way, don't be afraid to reposition or redistribute the whole pattern to make it fit. I did a 6x6 but you might need something different like a 7x8. Try to make the distance between rows and columns the same by leaving extra space on the outer sides.

Installation
The mirrors have a small hole in the back for hanging. Make sure to have the right nails with the smallest head possible. Don't take the tiny short ones, you want them to go deep enough to hold everything in place. Make a test before doing the whole thing to see how the mirror hangs and if your nails are the right length. Use a spot you know will be covered later on so if you need to try a few times and end up with 2-3 useless holes, it won't show. When ready, nail them all equally to prevent from having perfectly positioned nail marks but ending up with some mirrors lower because the nails were not all in the same angle (it's the nail head that really holds the mirror in place). Nails should be closer to 90° than 45° because it's hard to reproduce an angle with dozens of items. If your frames are lightweight and you think you can go fully horizontal, go for it. That's what I did. Although, I have to admit that every time there's the smallest earthquake, a common event here, I'm always afraid to find some on the floor but up until now, it's been fine. They just swing a little. In any case, and according to your location and lifestyle (kids, dog, busy spot, ...), don't forget to buy extras. This way you can replace them whatever happens.

What you'll need
• Eggshell finish paint
• Plastic protection cloth
• Painter's tape
• Paint brush, rolls, sticks, etc.
• Measuring tape, pencil
• Small head finishing nails
• Hammer
• IKEA Malma mirrors, white $1.99 (UPDATE: not available anymore, you can use anything else that's similar. If you really want to use those, have a look for online resales, some people change decor and get rid of them for a steal.)
Shopping notes
Table: IKEA Docksta dinning table $179
Chairs: Paris Tower dinning chairs, Overstock $50/ea (on sale)
Lamp: IKEA PS pendant lamp, white/copper $70