Mid-Mod Bedroom Makeover Part 1: DIY IKEA Curtain Wall
Share
Bedroom Makeover: It’s a GO!
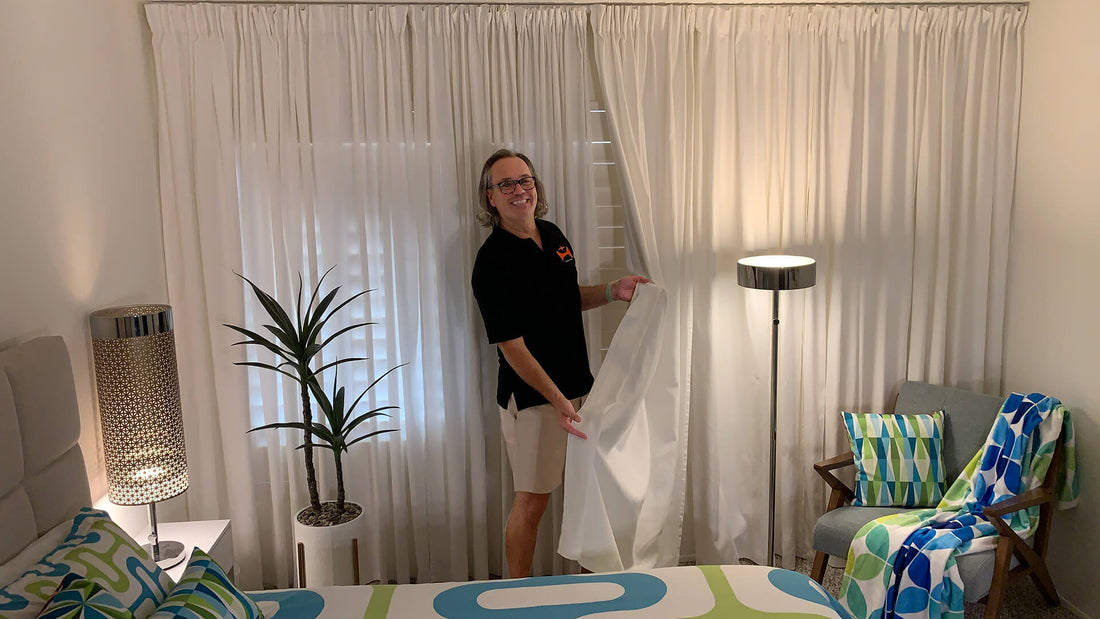
It's here! After talking about it for almost a year, I'm very excited to share with you that my mid-century modern bedroom makeover is finally underway! We'll start with this easy do-it-yourself project as Part 1: An IKEA curtain wall to recreate luxury hotel elegance at home without breaking the bank.
Before we dive in...
This first part is quick and easy as a project. So I'll take the opportunity to add an introduction that presents the genesis of this concept and how it took shape. All the major parts and secondary projects are self-explanatory so you won't need to refer elsewhere to accomplish any one of them but if you want to know more on the bedroom makeover as a whole, keep reading below!
MULTIPLE PROJECTS
This is a big endeavor with multiple sub-projects. That's why I will post them separately. An hour long article or video wouldn't make sense anyway. There are also other small projects that are related to the bedroom makeover but not exclusively, like how to fit a faux cactus in a mid-century modern planter, the IKEA Stockholm lamps hack or an upcoming wall art that's brewing and should be amazing. They will all be listed and tagged with "bedroom makeover" but they will not all be named as main parts of the bigger project, like this one.
FIND IT ALL: HUB OR TAG
To see all the main parts and smaller projects related to the bedroom makeover all in one place, you can visit the blog's Bedroom Makeover Summary Page. It acts as a hub for everything related to it with infos and all the links. You can bookmark that page and refer to it whenever you need to.
You can also open the Blog Tags drawer on top of every blog page and click the "bedroom makeover" tag to get a search results listing.
ADVICE
I came across some serious issues during this project. Instead of adding an update at the end to explain what happened, like I did in the video, I'll include my tips and advice along the way so you don't miss any of them.
Now, let's raise the curtain...
The starting point
First a bit of background on the origin of the concept. When I bought the condo, it wasn't at all like what you see now. It had been slightly updated here and there but nothing too fancy. The bedroom had flimsy dark blinds that were melting in the heat. I replaced those with shutters. The walls were cluttered with all sort of frames, stapled fabric, and even a make-shift nightstand from stone countertop leftover glued to a corner with a single leg made of wood boards.

Plus, the bed was on the opposite side so you had to go around it when entering the room. I removed it all and switched things around but it ended up revealing an original feature: a wood wall made of diagonal planks with a diamond-shape mirror in the middle! Quite a 1970s spectacle.

I didn't want to mess with it so I had dry wall put all over it. I painted every surface white to get a clean blank canvas, then I started the slow process of updating each and every item with a mid-century modern look in mind. Once I had a beautiful upholstered new bed, a nice mid-mod armchair, new nightstands, and gorgeous customized lamps, that's when I realized I had to do something with the walls to tie it all up and bring a special feeling to the room.
Concept

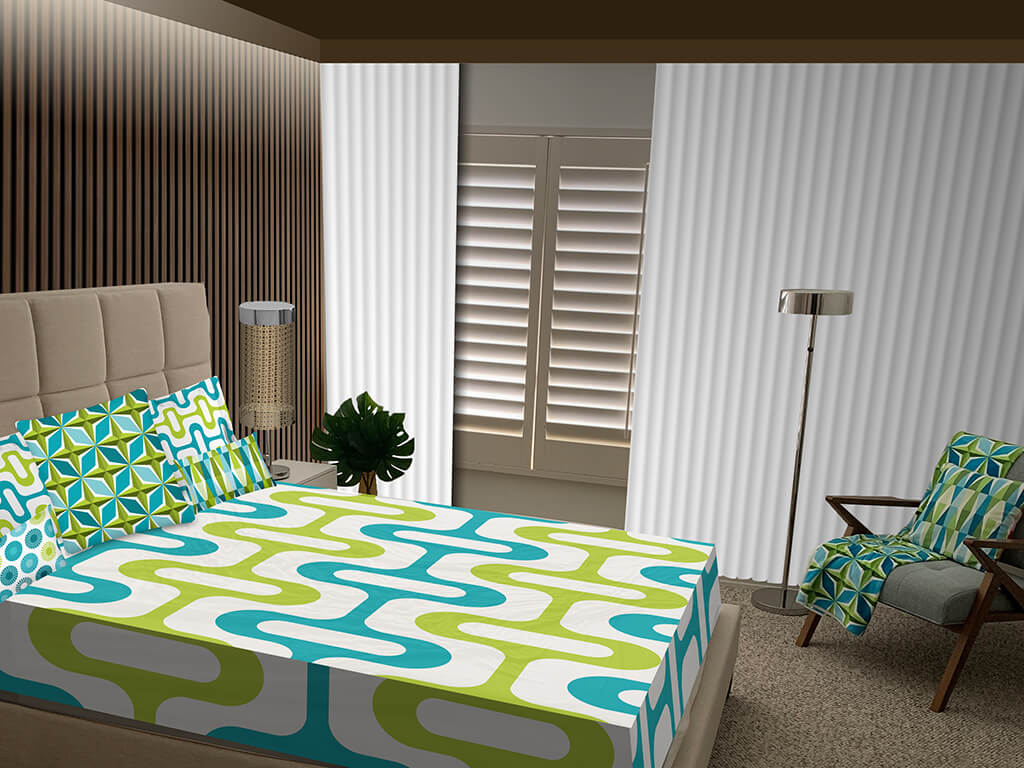
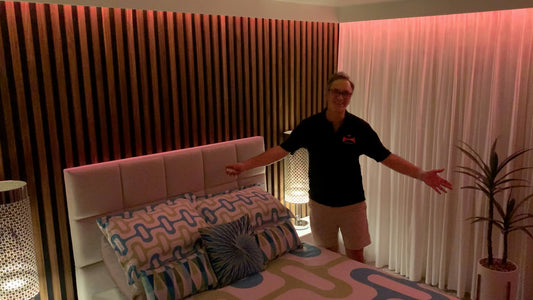
I worked on a concept for months. My final idea is based on creating vertical lines on the 2 most prominent walls. To highlight these lines, LED light strips on top would glow down for an elegant effect. A simple facade board hanging from the ceiling will hide the lights and the pleated top of the curtains.
To achieve those vertical lines, one wall will be entirely covered with curtains. It should help with glare, sound, and heat. A curtain wall is reminiscent of luxury hotel rooms with elegant drapes covering the whole wall. But in the mid-century era, a curtain wall was a common feature of modern homes that often had floor to ceiling glass walls to bring a feel of the outdoors inside. There are many original houses like these still in good shape here in Palm Springs. Those two concepts mixed together is where the curtains inspiration came from. This is the current Part 1 of the project.
For the wall behind the headboard, it will be covered with wood slats. That idea was also inspired by a Palm Springs house but a brand new one this time. Last year, on a street corner in the Movie Colony neighborhood next door, a new amazing house was built with the main feature being a facade made of wood slats with black spaces in between. It's incredibly gorgeous and typical of mid-mod houses but you'd probably find such a feature indoors in the living room or as a divider.


This is the inspiration for the wood wall but here, we'll do it in the bedroom. I took many pictures as a reminder during construction of that house. I knew I would use this idea one day. So here we are... I'll paint the wall black and install stained wood slats. That will be Part 2 of the bedroom makeover project once I catch my breath!
Lastly, Part 3 should include all the other sub-projects like the head molding, lights, ceiling and finishing touches.
So to summarize the concept, we'll have a wall of vertical wood and a wall of vertical fabric, with hidden ceiling lights glowing down. For an even more dramatic effect, the molding hiding the lights and the whole ceiling will be painted dark brown, enhancing the wood on one side and contrasting with the white curtains on the other side.
Concept... on ice!
But then, I had to put my project on the ice for quite a while. That's because since I need more storage at home, I had planned to add a tall and large IKEA PAX wardrobe with mirror doors in the bedroom. The mirror doors would make the room seem bigger (and mirrors are fun in a bedroom, right?...). It would give me more space for clothes, plus free up storage in the hallway that I desperately need. That was suppose to be the anchor and first step of my makeover. Not mid-century per se but without it, it seemed premature to do anything else. But during and after the Covid-19 pandemic, the supply chain issues were crippling IKEA's production capacity so hard that the main parts—frames, doors or shelves—were rarely available or never all at once. I didn't want to make multiple trips (it's 90 minutes away) so I waited, and waited...
After a while, I got fed up of staring at the big white space above my little dresser. One day, during a search in the balcony storage, I retrieved an old mirror that I always wanted to revive. I decided to give it a new mid-mod life to fill up that empty wall. You can find that project on the blog here and that video on the YouTube channel. But then weeks later—life is a magician—I made an improvised visit to IKEA to get knick-knacks and I found everything I needed for the curtain wall. It made me realize that at the end of the day, the PAX wardrobe could wait. And this is how the bedroom makeover was back on track.
The project
One of the reason behind including this project in the Bedroom Makeover was that many people feel that everything is so retouched and scripted these days that it's almost impossible to reproduce at home the same elegant and fancy decor you'll see on TV, find online or in magazines without spending a lot of time and money on professionals or specialized firms. I wanted to prove that wrong.
I thought this should be and easy project with good planning and patience. Anyone could do this with basic tools and abilities, it's only curtains after all. Well, think again! I encountered some pretty annoying issues. Nothing insurmountable but it did make the road much bumpier than I thought. Expected the unexpected, right? At least I can laugh about it now and you might too when you find out...
So here's the story of what I did and how I fixed issues along the way. If you decide to make your own beautiful curtain wall, I hope it will help you know in advance what to expect and provide useful advice to keep it fun and easy. If you try it out, leave me a comment!
Choosing the right curtains
I wanted to get my curtains from IKEA because of the wide selection and return policy, but also because they are ready-made with a header that can accommodate any way you hang them: rod, hooks, pleats. Today, a typical curtain wall is often made of lightweight or translucent fabric that provides privacy while letting light through because newer windows are energy efficient. But back in the mid-century days, it was mostly heavy, opaque curtains to block the heat from oversized glass walls. In my case, even though I have great shutters, there is a light post in front of my bedroom window, so there is always a bit of a glare. Not to mention the heat that is pretty intense in the Coachella Valley for my windows that are probably original. All of this directed my preference to "blackout" curtains. But when I did my research, IKEA didn't offer blackout curtains in white (although the website filters mistakenly suggested otherwise, referring you to a blue curtain! That seems to be fixed now). So I opted for light-filtering curtains instead. The only model that caught my attention was TIBAST. They have a beautiful texture and they're more heavyweight which makes them hang beautifully with an elegant feel and not let too much light through. I'll decide later if I want to add liners to achieve the blackout function.
I chose a ceiling installation that fits my plan. The rails include the ceiling fittings to connect them together. They also have optional wall brackets, sold separately.
Calculating how much you need
For a nice pleated effect, you need to count at least 2-3 times the width you want to cover. Here's my own math:
- 1 panel = 57"
- 1 pair (2 panels) = 114"
- My 12-foot wall = 144"
- 2X to 3X my wall = 288" ~ 432"
- 2 / 3 / 4 pairs = 228" / 342" / 456"
Which means I need at least 3 packs of 2 panels.
I bought 4 packs just in case since you can always take them back if it reveals to be too much. An on-site employee explained that when you're an IKEA Family member, you have 3 months for returns, even if the package is open. In the end, I installed all 8 panels and I love it. That's actually what makes it dense and look so chic. Testing and foresight proved to be useful once again.
Shopping list
Here's my shopping list for a 12-foot wall. As they say, your mileage may vary. (Prices are from summer 2022)

- Curtains: 4 pairs of TIBAST curtains (8 panels). $172* ($43/ea)
- Tracks: 3 Vidga single track rails (Each 55", includes ceiling fittings) $42 ($14/ea)
- Gliders: 4 Vidga gliders packs (One per curtain pair, I didn't use the small plastic hooks but instead the metal ones below) $16 ($4/ea)
- Hooks: 4 Riktig metal hooks packs for the pleated effect $28 ($7/ea)
- Hemming: 1 SY hemming tape (and later on Heat n Bond Hem Adhesive at Walmart because I didn't have enough...) $4 ($2 + $2)
* Note: There are of course cheaper options but months ago, there was an IKEA promo on gift cards at 20%-off so I bought a $300 card, which gave me 3X-$20 gift cards for FREE. When this goes by, don't think twice! Plus, they did not expire.
Total: $262 (About $210 with gift cards promo)
The setup
I first emptied my bedroom to show you my original setup, the blank canvas I started from. Then I used the top of my dresser as a working area.
Tips:
- Gather all the recommended tools in the instructions
- Get containers for supplies to avoid losing small parts
- Keep a calculator at hand, especially if your phone will be busy (music or else)
- Scissors, ruler, pencil, measuring tape, level, scotch tape, etc.
- Gather your other basic tools in a bin to avoid having to run for a drill, hammer, etc.
- Plan in advance for screws and anchors depending on your installation type
- Bring a trash can and recycling bin near you for quick toss up
- Read the plan, choose your setup, fold it up, scotch it on the wall if you can to free up your workspace
- Protect you working area with a cutting mat or cardboard
- When you shop, don't forget to get the right railing kits and accessories depending how you install or if you go for multiple layers
First steps: prep and test
Because my shutters are not original, they're installed on the outer edge of the window on the wall. Therefore, it's an extra width to consider. Since I had to figure out how much space I need to allow from the wall to install the rail on the ceiling, I decided to test out one panel on a rail by hanging it by hand. Once I knew where to screw the rail in, it was a very straightforward thing after that. I opted for a pleated style so I had to insert metal hooks on the drapes instead of using the small plastic ones that you clip on the gliders.
Here's what I did...
- Put supplies in containers, unbox rails
- Open curtains, remove tags
- Take one rail, block one end with a provided stopper
- Insert 10 gliders into the rail and block the other end temporarily (1 panel = 10 gliders/hooks)
- Prep a curtain panel with 10 metal hooks by inserting each outer bar of a metal hook on the 3rd fabric slot from the right and left side of a pole loop (see pic above for reference). On the outer ends, you can start closer to the edge and do 4-2 or 2-4 depending on how the strip was sewn in.
- Install the hooked-ready panel on the hooks of the rail
- Test the rail in place and mark the final position
- Install anchors and screw in rails (follow instructions)
- Optional: Hook up all panels (80 hooks), hang them for testing. If you want my advice, you should do this to be sure of the result.
Tips:
- Anchors: if you stumble on a spot that can't be drilled through, don't worry you can always move a few inches away, it won't show anyway
- Rails: Don't aim to extend the rails flush on both opposite walls and think of leaving some extra space at one end, just enough to be able to unscrew and remove the stopper in case something happens or you want to adjust the number of gliders without having to uninstall a rail
- Hooks: Those metal hooks felt greasy or something. They left grey spots on the curtains once I took them off for washing. I decided to wash them too. Maybe that's overkill but that's me.
- Handling: When picking up the hooked panels to install them, be careful how you manipulate them because if you let the header drag down, the smaller fabric slots on top of the hooks will come off and it's very tricky to put it back once you're up there trying to hold everything together
- Cutting: Don't cut any curtain too soon and read further on what happened to me
Some of the steps I just described are somewhat optional. But depending on the effect you want to achieve, I think it's a good idea to figure out in advance the scope of fabric that'll be on your setup, even though it's more trouble to hook them twice. The point is, why not find out right away if you have too many panels or not enough and how it looks in general, before washing, ironing, cutting or taking any definitive step.
Now, that's where it becomes tricky...
Next steps: wash and dry
I'm a perfectionist. I take great pride in preparing and thinking things over. But sometimes, things seem to have a life of their own, right? Well... After reading on the curtain package that there was a 4% shrinkage factor, my natural solution was that if I wash them first, it would secure the height of the fabric and once cut, they'd stay the same forever. Even though I probably won't wash them a second time for a while, I'm pretty sure about this one. But that's when I realized that those curtains cannot be tumble dried!!! Oh my lord... It's an HOA in the desert here. There's nowhere to leave 8 curtain panels to dry. I had to be very creative and quickly fiddle a drying line in my living room, the only big enough space to accommodate them all. I installed two oscillating fans at max speed and it took 6-7 hours to dry out.

Now I hear you wonder why in the world I did not hang them to dry on the rails? Very simple. Even before washing them, it was obvious I'd have to iron them before final installation with all these wrinkles. Imagine after! So it was pointless to hang them in place to dry first, they would have been cramped in there, making ironing even worse. In the end, it all worked out. But they better stay clean and nice because I won't be doing this again anytime soon!
Last steps: iron, install, cut
To be or not to be equal...
Now that they are clean, I folded them and left them on the chair. I took my first panel, ironed it as best as I could, hooked it up, installed it, measured the excess length and took it down for cutting. For convenience, I cut a piece of cardboard for 5", the measure that I would reproduce on everywhere. This should speed up the process. So I put the first one back up and went on to the second panel, using my measure, same process.
Here's what happened...

Yup. Too short this time. How in hell is this even possible?!? I panicked!!! I took all remaining panels, put them flat on the floor and realized that NONE were the same length! Too late for my 2nd panel now, it's already cut. So I took down my first two panels and inverted them so that the shorter one would be in the back of the chair. Hidden forever. Time to think of a foolproof solution.
Here's how I did it...
- Iron panel starting on the bottom, on an ironing board between the bed and window
- Extended the ironed part on the bed as I went along
- Hook it up
- Install carefully
- Needle one side of the bottom to make it similar to the previous panel
- Take the panel up on the ironing board (no need to take it down, it's already ironed now)
- Repeat needling on full width
- Bring the panel down to check the measurement
- Repeat if necessary (I did have to a few times because the edge wasn't always the perfect guide)
- Once measurement is perfect, iron down tightly on the fold, let cool to set the fold
- Remove pins, unfold carefully
- Insert hem tape inside the edge of the fold, refold
- Iron with a damp cloth (follow instructions)
- Let cool to set the grip
- Cut the excess (be careful, the tip of the scissors will tend to grab the other side under)
- Cut the inner corner in an angle if the fold is slipping out slightly
- Let hang by itself
- Enjoy!
Here's the result of the tedious cutting process once all panels are done:

A fun anecdote about cutting: I didn't know in advance how much fabric I would use. I didn't think of it this way. I ended up with an 8-panel curtain wall, which means 38 ft of fabric to shorten down (57" X 8). Surprise! The IKEA SY hemming tape package contains only 33 ft... So at my last panel, I realized I didn't have enough! I looked up online and found out that a similar product is available at Michaels or Walmart. I made a quick trip just for that but you might want to plan ahead!
And we’re done
I have to be honest, it's absolutely gorgeous. But it's not at all the walk in the park I thought this would be. All in all, I'm SUPER excited, it's really beautiful and it feels way more expensive than it really is. Just take your time, plan ahead, and you'll love it too!

See you soon for Part 2: Wood Slats!


